Category Archives: Camping

Tips for Eclipse Camping Newbies

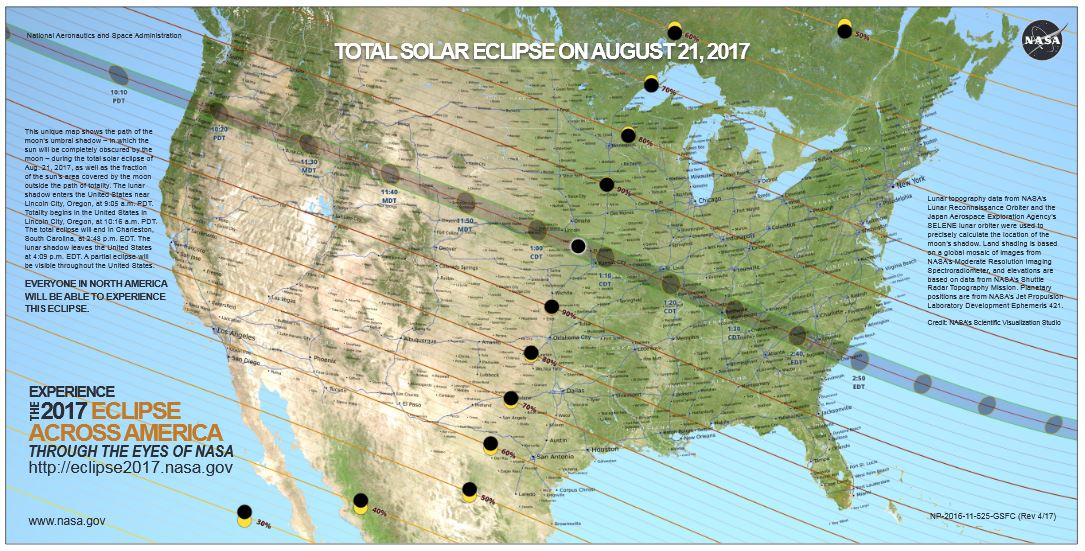
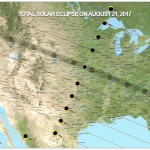
Path of Totality. NASA image.

Path of Totality. NASA image.

If you recently decided to travel to view the eclipse on August 21, you might have first checked to see if there were any hotels inside or close to the area of totality.  When you did, you probably discovered that there are none, or they would cost hundreds or thousands of dollars.  In many areas, the only option, if you need to stay overnight, is to camp.  Fortunately, many temporary campgrounds, some with very reasonable prices, have sprung up from Oregon to South Carolina.  I have a listing of many of these campsites.  Wherever you will be viewing the eclipse, it’s likely that you will be able to reserve a campsite in advance, and knowing that you have a safe place to stay Sunday night will relieve much of the stress.


Quick Links


stelprdb5325060If you have experience camping, then you probably won’t learn anything new from this page.  This page is devoted to the newbie who has never been camping before.  You’re going camping this time only because you have no other options.  There’s nothing wrong with that, and with a little bit of preparation, you’ll have a pleasant experience Sunday night, and you’ll get a good night’s sleep the night before the eclipse.  I’m an Eagle Scout, and my family regularly goes camping, so I might be considered an “expert.”  But it’s not necessary to be an expert to enjoy a short camping experience.  On this page, I show the preparations that are necessary for the newbie to have a pleasant camping experience.

In many of the areas I’ve checked,it will be possible to get a hotel room on Monday night, the night after the eclipse.  By then, most chasers will be headed home.  So even if you need to stay a second night at your eclipse viewing location, or stay overnight on the drive home, you’ll probably only need to camp one night, Sunday night.  On the other hand, some areas might be so congested that it will be best to arrive Saturday and wait until Tuesday before starting home.  Even if you need to camp two or three nights, the advice on this page should get you through the adventure.

You will need to go out and buy some stuff.  If you walk into your local outdoor store and tell them that you need to outfit yourself for camping for the first time, the salesperson will see dollar signs and offer to sell you expensive deluxe equipment.  While it would be nice to spend hundreds or thousands of dollars for the best equipment, it’s not necessary.  On this page, I have some recommendations of some of the things you might need.  Nothing on this page is the deluxe version.  Most of these recommendations are for the bare minimum cheap version of the various products.  But for one or two nights, they will prove adequate.  In many cases, the expensive versions are more durable and will last many years.  But for one use, the cheap versions will usually be just as good.


Tents

The first consideration is to decide whether you will actually need a tent.  Depending on what kind of car you have, it might work just as well to sleep in your car.  Trying to sleep while sitting on one of the seats, even if it reclines, usually doesn’t work very well.  There’s a reason why humans lie down to sleep, and they’ve done this for millions of years.  But if your vehicle has a flat surface long enough for you to lie down, then sleeping in the car might be the best option.  If your vehicle is wide enough, you might be able to stretch out on the back seat.  In a van or SUV, there might be enough room on the floor.  In a hatchback, if the back seats fold down, then you can sleep in the back.  The only way to find out for sure is to crawl in there and see if you can lie down.

If you do decide to sleep in your car, remember that it will get hot in there, so you’ll need to roll down some or all of the windows.  Therefore, you will need some kind of screen to cover them to keep the bugs out.

If you can’t find a large enough flat surface in your car, then you probably want to get a tent, and this will be your first purchase.  The most important advice about tents is:  Practice setting it up at home!  Most tents are relatively easy to set up, but there’s always a learning curve.  And every tent is different.  While you’re still at home, you want to make sure you know how to set it up, and that no parts are missing.  In campgrounds, I’ve witnessed many unhappy couples taking out a brand new tent and then realizing to their horror that they don’t know how to set it up.  If they had practiced a couple of times at home, they would have saved themselves a huge amount of frustration and stress.

When shopping for a tent, you will see that they are marked with how many persons they sleep.  However, almost without fail, these numbers are the absolutely maximum number of people you could possibly squeeze in.  So for a “two person” tent, yes, you could cram in two people if you really had to.  But it would be a lot more comfortable with just one person.  So if you really have two people, then you would probably be better off with a three or four person tent, even for just one night.

Normally, I have an important piece of advice when shopping for a tent.  That advice is to get a tent that you can stand up in.  If you’re going to be camping regularly, this is extremely important.  At home, when you get out of bed, you stand up.  Right before you get in bed, you are standing up. When you change your clothes, you stand up.  You don’t normally notice it, but the sleeping process involves a lot of standing.  So normally, I recommend getting a tent that allows you to stand up.  It really makes camping a lot more pleasant.

Unfortunately, however, the cost of tents gets exponentially higher when you get one big enough to stand up in.  If you’re really getting a tent that you’re only going to use once, you’ll save a lot of money by getting a smaller one.  And the smaller tent will also be a lot easier to set up.  So in this case, I’ll modify my normal advice.  It’s annoying having to crawl around on the ground while you get in bed.  It’s annoying having to change your clothes while crawling around.  But it’s also only one night, and you want to save money.

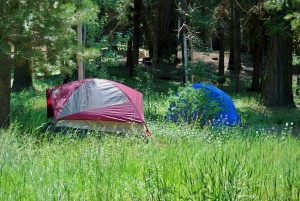
With that in mind, a tent similar to the one shown here is my recommendation for one person.  Two people could probably squeeze in, but it wouldn’t be particularly comfortable.  The primary advantage of this tent, the Stansport Scout Backpack Tent, is that it is cheap.  It is also lightweight and won’t take up much space in your car.

The other big advantage, though, is that it’s easy to set up.  As you can see, the A-frame style of this kind of tent is very “old school.”  It doesn’t look futuristic like many of the dome tents that you see.  However, in my experience, the dome tents are harder to set up, and they often require two people.  (Dome tents, however, have the advantage of not needing stakes in the ground, although they are usually highly recommended.  With the inexpensive A-frame tent shown here, the stakes are absolutely necessary.)  Dome tents are harder to set up because the poles have to go in just the right spot.  Also, the poles need to be just the right size and shape.  If you break one of the poles for a dome tent, it’s usually easiest just to throw the tent away.  With this type of tent, if you break a pole, you can improvise and just use a stick of about the right size.

Setting up this kind of tent is very easy.  First, you just pound in a stake in each corner to hold the floor tight to the ground.  (It’s a good idea to bring along a hammer for this purpose.)  Then, you pound in a stake about 3 feet in front, and about 3 feet behind.  You put in the poles, and then you run a rope from the top of the pole to the stake.  Finally, you put in two more stakes on the side, and run ropes to hold the side walls out.  It really only takes about 5 minutes.

If you have more than two people, then you really do need to move into the “dome” tent category and get something like the one shown here, the “three person” Wenzel Alpine Tent.  Even though it’s billed as “three person,” it’s really only suitable for two.  It’s still quite inexpensive.  It is harder to set up, and you’ll definitely want to practice at home.  The setup really requires two people, since it’s usually necessary to have one person hold a pole in place while the other person inserts it in the correct spot.  Poles have to be put up in a certain order, and you will need to read the directions.  It’s not particularly difficult, but you will need to practice at home.

The “six person” tent shown here, Coleman Evanston Screened Tent, is still relatively inexpensive, and would be a good choice for two adults and two or three children.  An 8-person version is also available.  At this point, the tent is getting large enough so that you can stand up in it.  Even if you have to stoop over a little bit, being able to stand makes it a much more pleasant experience.  This larger tent is also more complicated to set up, so you’ll definitely want to practice at home.

Sleeping Pads

The ground is hard!  The floor of your car is hard!  Your camping experience will be infinitely more comfortable if you have something soft to sleep on.  You have a number of choices.

If you’re getting a large tent, then you might consider getting a cot to sleep on.  A cot is infinitely more comfortable than the ground.  If there’s room and it’s in your budget, then you might consider getting one like the one shown here.  But if you have a smaller tent, or want to economize, then the other option is to get some kind of soft object to sleep on.  You can chose between some kind of foam pad, or an air mattress.

Foam pads are somewhat more convenient, but they are mostly designed to insulate you from the ground.  While they are softer than the ground, they’re not particularly comfortable to sleep on.  Therefore, my personal preference is an air mattress.

If you know for sure that this will be your only time camping, then you might want to simply get a cheap air mattress like the one shown here.  These are most commonly used at a swimming pool, but there’s no reason why you can’t sleep on one.  Eventually, it will spring a leak, but in the meantime, it will make your sleep more comfortable.  These also have the advantage of being inflated with lung power, so you won’t need to buy a special pump.

You can also get an air mattress designed for sleeping, such as the one shown on the right.  These are very comfortable, and it will feel like sleeping on a normal bed.  They are relatively inexpensive, but they do require a pump to fill them up.  You can get a  pump that is battery operated or one that plugs into your car.  (Note:  even If you have a compressor for putting air in your car tires, it will not work for filling the air mattress.)

Sleeping Bag

The eclipse will take place on August 21, and whether you are in Oregon or South Carolina, it will probably be hot.  So you don’t need to worry much about a sleeping bag.  In fact, you might want to just bring normal sheets and blankets from home.  But if you do want one, a cheap sleeping bag like the one shown here will be more than adequate.

One thing to keep in mind about cheap sleeping bags is that there’s a possibility that they won’t survive one washing.  Washing them might result in the insulating layer getting messed up.  They’re great until the first washing, though.  Therefore, resist the temptation to wash the sleeping bag before using it, not that it would be necessary.  When you get home, you can take your chances and throw it in the washing machine.  If it survives, great.  If it doesn’t, you already have your money’s worth from it.

Cooking and Eating

If you’re going to be camping out West, then there’s a major fire danger, and it’s likely that you will not be able to have a fire or even a charcoal grill.  You might consider buying a propane stove, but you’ll only be camping for one or two days.  I would recommend just getting a cheap cooler.  You can buy disposable styrofoam coolers like the one shown here at most supermarkets.  Just fill it with ice and pack food that you can eat without cooking.

Whatever kind of cooler you use, you will find that it’s very helpful to have a large supply of Ziploc bags.  The ice will melt, and no matter how careful you are, the items inside will be floating in water.  If you pack everything in sealed plastic bags, then you won’t have to worry about it.

Don’t forget to bring utensils, paper plates, cups, napkins, etc.  There’s no need to purchase special “camping” versions of these items, since the ones you have at home will work perfectly well.  Buying a large assortment of plastic silverware will mean that you don’t have to worry about washing dishes.  And don’t forget garbage bags.  It’s possible that the dumpster of your temporary campground will be overflowing, in which case you might need to take home your own trash.  Having good trash bags with you will make the process much more pleasant.

Portable Toilets

Normally, if you go camping to a state park or private campground, you don’t have to worry about where to go to the bathroom.  There will be a restroom within convenient walking distance of your site.  However, for the eclipse, thousands of people will be camping in temporary campsites.  Hopefully, the owners have rented enough toilets to accommodate everyone.  But there’s a distinct possibility that some of them have underestimated the need.  And if you’re stuck in traffic, or parked at a remote location waiting for the eclipse, there might not be a restroom nearby.  Fortunately, you can bring your own from home!

Shown here is the Passport Potty from Sanitation Equipment.  It’s relatively inexpensive, but when you need it, it’s worth its weight in gold.  It would fit inside a family-size tent.  And unless you a driving a compact car, there’s probably enough floor space in most vehicles to have it there. A very similar model available at Walmart at this linkicon. You can order online, and then pick it up at the store the same day.

To use it, you go as you would with any other toilet.  To “flush,” you open a valve at the bottom, and rinse the bowl with the built-in water pump.  You then close the valve, and the contents are hermetically sealed into the compartment below.  Spray a shot of Febreeze into the air, and the crisis is over!  Especially if you have young kids, owning one of these can be a lifesaver.  No eclipse chasing vehicle is complete without one!

If you buy one of these, you will need to buy some of the chemical to put in the tank, which is quite inexpensive.  I prefer the pouches of dry chemical, but it’s less expensive to buy a bottle of the liquid chemical, since you only need a very small amount.  Of course, you will also need toilet paper.  While not absolutely necessary, it’s best to use the special RV toilet paper, since it breaks down faster and makes the emptying process easier. You can also buy the toilet chemicals iconand toilet paper  at Walmart. You can order online, and then pick them up at the store the same day.

When you get home, or when you get to the first flush toilet of your voyage home, it’s a relatively simple matter to empty the toilet.  However, this is one area where it’s best to practice at home.  Fill the toilet with clean water and practice emptying it a few times.  After a few tries, you will be able to do it confidently and without spilling.  While you are camping, hand washing facilities might not be available.  So it’s a good idea to pack some hand sanitizer.

Flashlights


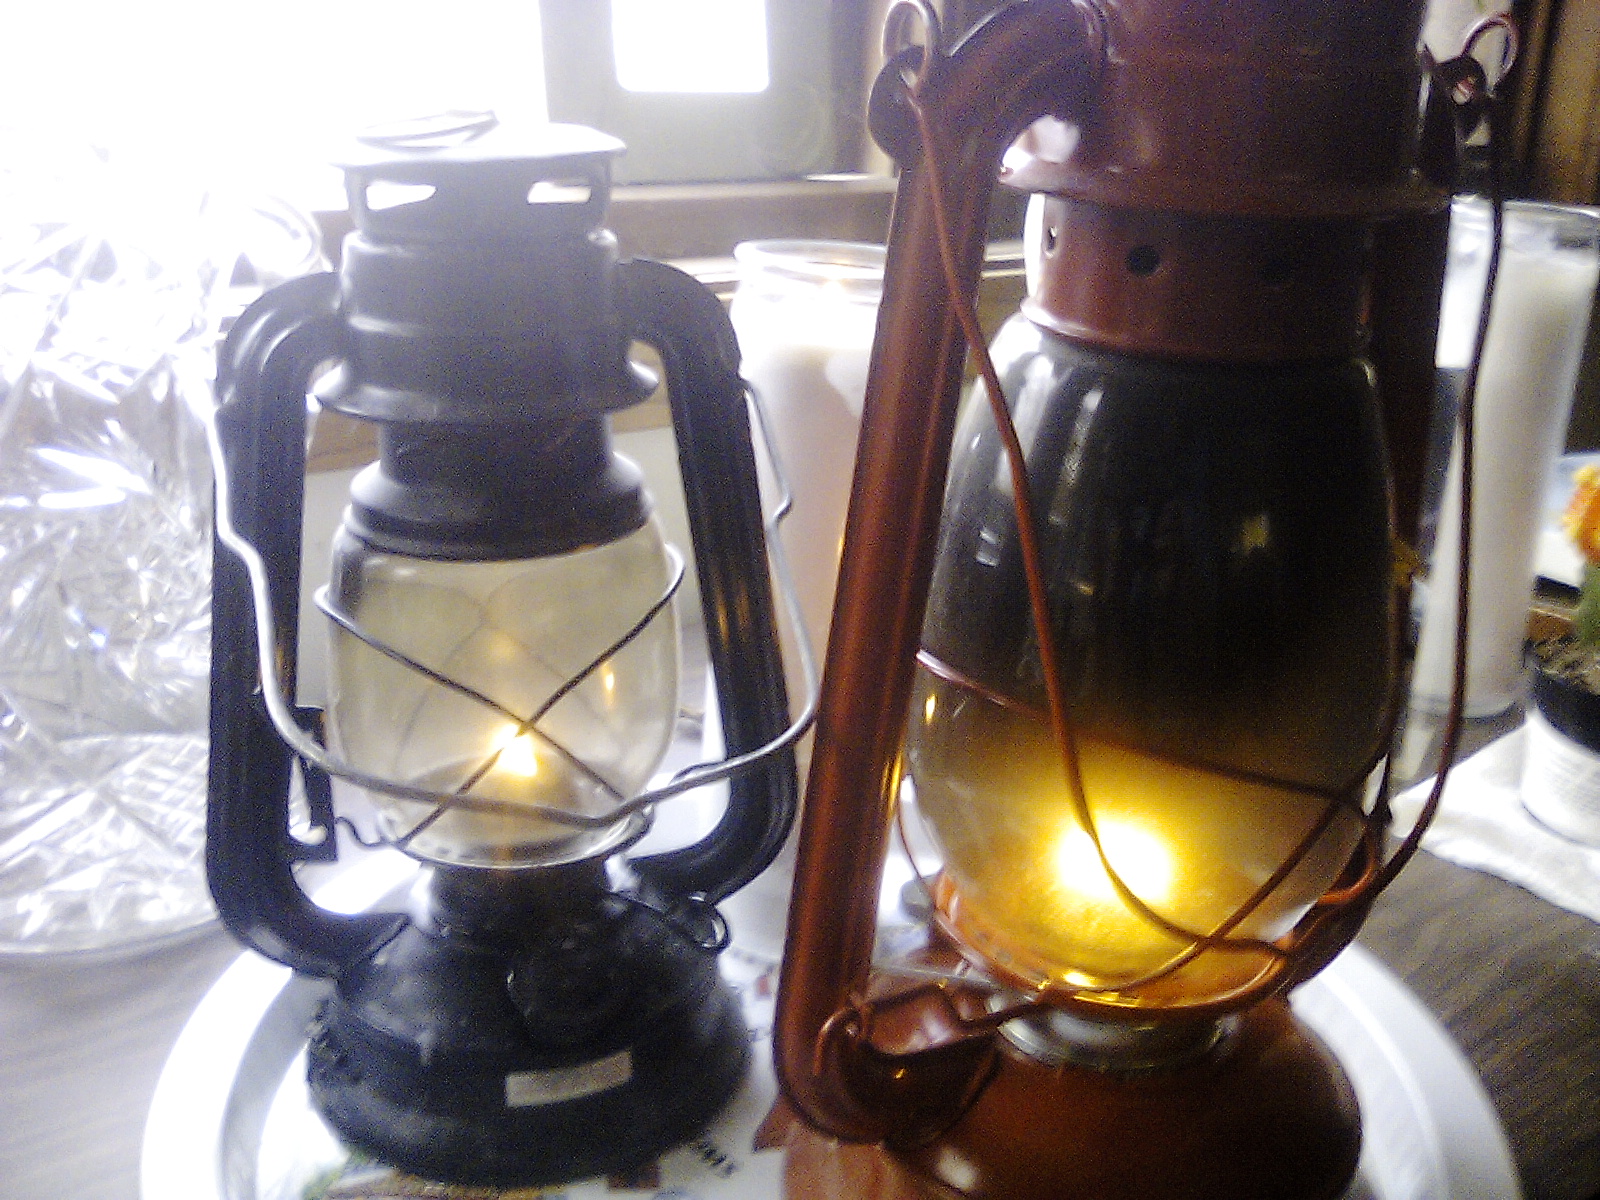
In order for there to be an eclipse, there needs to be a new moon.  And if you’ve been careful picking out your eclipse camping spot, you picked a spot without street lights.  This means that the night before the eclipse, it’s going to be dark.  When the sun goes down, you won’t be able to see anything.  You can probably fumble around with your cell phone and get a little bit of light, or you can even annoy your camping neighbors by turning on your headlights.  But life will be a lot easier if you bring along some flashlights.  The flashlights shown here are inexpensive, they’re durable, and they work well.  Bring along a few more than you need, along with plenty of extra batteries.

There’s also a good possibility that you won’t have cell service or that the network will be overloaded.  Therefore, it’s a good idea to also bring a good portable radio for receiving weather and traffic information.  One good option would be this radio, which pulls in NOAA weather broadcasts in addition to normal AM and FM stations.  It also features a hand crank, which means that you can continue listening to it even if the batteries go dead.


If you have the basics listed above, you’ll survive your camping adventure and actually enjoy it!  Since local stores and restaurants won’t be able to keep up with the demand, bring your own food and water from home.  Enjoy your adventure!



2024 Eclipse Campgrounds

This is a listing of camping that will be available prior to the April 8, 2024 eclipse.  We maintained a similar list in 2017.  Some of the listings were for organized events, and some were merely property owners making their property available.  If you would like your camping facility listed here, please contact me at clem.law@usa.net with the relevant information.

If you are new to camping, see my page with advice on camping with inexpensive gear.

Note:  I don’t have any direct knowledge of any of these links, other than what they have on their websites.  Please contact the owners directly and ask any questions before making reservations.  The sites listed here range from very expensive “glamping” locations to inexpensive spots to pitch a tent in someone’s back yard.  Some will take self-contained RV’s only and no tents.  Others will take tents only and not RV’s.  So do your homework! Most of the listings explain whether or not toilet facilities are available.  If you’re not sure,  be sure to ask the owner.

Texas

Arkansas

Missouri

Indiana

Ohio

  • Findlay, OH.  Tent and RV sites, $185 per night, 2 night minimum.

Pennsylvania

  • East Springfield PA, Liars Den Fishing Lodge.  10 tent sites, 13 RV sites, lodging.  $115 per night, two night minimum.  Contact 541-530-0812 or crouchwendy at icloud dot com.

Oklahoma

Illinois

Kentucky

Michigan

New York

Vermont

New Hampshire

Maine

Ontario
Québec
New Brunswick
Nefoundland
Prince Edward Island

Mexico


ISO Certified Eclipse Glasses: $3.99 with Free Shipping. Made in USA.


2017 Listings

The links shown below are not current.  This was a listing I made prior to the 2017 eclipse.  I’m leaving the links here for the time being, mostly for the benefit of property owners interested in offering camping in 2024.  While most of these links no longer work, some of them do, and you’ll get an idea of what prices were charged in 2017, what amenities were offered, etc.

Oregon (2017)

Idaho (2017)

Wyoming  (2017)

Nebraska  (2017)

Kansas  (2017)

  • Robinson, KS – tent sites on football field
  • Summerfield, KS – Campers, $30, tents $15, for reservations call 402-xxx-xxxx. Taco bar benefit supper Sunday evening, 50+ campsites.

Missouri  (2017)

Illinois  (2017)

Kentucky  (2017)

Tennessee  (2017)

Georgia  (2017)

North Carolina  (2017)

South Carolina  (2017)

Advertisement:


Other Eclipse Links

Here are some links with more information regarding the August 21, 2017, solar eclipse:

General Eclipse Information:

Radio Links

Since radio propagation is affected by solar radiation interacting with the ionosphere, the brief period of “night” in the middle of the day can have measurable effects on radio signals, and some of these effects are not completely understood.  For that reason, there are some opportunities for citizen science by amateur radio operators during the eclipse.

I haven’t decided exactly how I am going to participate, but what I will probably do is send some beacon transmissions which will be picked up by stations of the Reverse Beacon Network.  This will allow me to participate with relatively little attention required by me while I watch the eclipse, but I’ll be able to review the data later and see how the eclipse affected my radio signals.

I will make this information available live during the eclipse, and you will be able to monitor how the eclipse is affecting the propagation from my transmitter.  At this point, I’m considering doing these experiments on 30 meters (10 MHz).  Effects will probably be more pronounced on lower frequencies, but higher frequencies will allow a more efficient antenna.  I think that 10 MHz probably represents the best compromise, but I’d welcome any input.

The following links include information on radio experiments to take place during the eclipse:


Get Your Eclipse Glasses and Hotel Rooms Now!

Path of Totality. NASA image.

Path of Totality. NASA image.

On August 21, 2017, a total eclipse of the sun will be visible as it passes across the United States from Coast to Coast. This is the first time an eclipse has been visible from coast to coast since 1918. I have seen partial eclipses, and they are a somewhat interesting phenomenon. However, I have never witnessed a total eclipse of the sun, and my family plans to travel to Nebraska to view it.

The total eclipse will be visible only on a band about 70 miles wide stretching from Oregon to South Carolina.  If you are not within this band, you might not even notice the eclipse if you’re not watching for it.  But within this band, the sky will become dark, stars will be visible, and only the sun’s corona will be visible.

During the approximately two minutes of totality, it is safe to view the sun with the naked eye.  But even if only a tiny portion of the sun is visible, then it is necessary to use eye protection.  Therefore, if you are planning to view the eclipse, two things are necessary.

1.  Get Your Eclipse Glasses!

First of all, you will want to get a set of eclipse glasses, such as the ones shown here.  With these glasses, which cost about $2, you will be able to safely view the eclipse if you are not in the path of totality, or if you want to look at the sun before and after totality.

During a 2015 partial eclipse in England, there was a shortage of the eclipse glasses.  In the days leading up to the eclipse, thousands searched in vain to find a pair, but there were none available, or they were available only at grossly inflated prices.  These glasses are still readily available online at reasonable prices.  I recently purchased 10 pairs of the glasses shown here, and they were shipped to me in about a week.   The total price for 10 pairs, including shipping, was about $17.  I’ll post a review in a few days, but they appear to be well made for what they are, and they have the appropriate ISO safety certification.

Unfortunately, I don’t know anyone else who has ordered in advance.  I suspect that, just like in England, there will be a huge demand at the last minute.  Stores won’t have them, and it will be too late to order online, or online suppliers will also run out.  Therefore, I strongly recommend that you order now while they are still available.  The set of ten that I ordered can be ordered from the following Amazon link:

Numerous other options are available on Amazon at this link.

In the Twin Cities area, I am only aware of these stores selling eclipse glasses.  They are:

2.  Make Your Hotel Reservations!

The other item you will want to consider is traveling to view the eclipse.   The partial eclipse that will be visible in most of the United States is certainly interesting, but for most, the total eclipse, visible only in a 70 mile wide band, is a once in a lifetime experience.  Most Americans are within a day’s drive, and it’s certainly worth the drive.  Surprisingly, some hotel rooms are still available, even though many cities along the path have been booked solid for months.  My family will be staying in Hastings, Nebraska, although that city is now completely sold out.

If all else fails, I would recommend simply driving to the path of totality, and sleeping in your car if necessary.  However, rooms are still available in many cities on and close to the path of totality.  The following table will give you some idea of what is available.  As you can see, the last hotel room in Casper, Wyoming, is a modest motel going for $800 a night.  But even though rooms are filling up fast, the following table gives you some idea of what is available.

This table shows availability at Hotels.com, as of June 16.  As you can see, many cities still have bargain hotels available.  This will certainly change as the eclipse gets closer, so. I encourage you to do as I did and make your reservation now.

I have included a link to the least expensive hotel in the city.  In some cases, this hotel might be a few miles from the path of totality, so you will still have to drive to the location of the eclipse.  But by booking a nearby hotel, you will make the process much easier, since you won’t have to worry about driving all night or sleeping in your car.  This chart shows availability for the night of August 20, the night before the eclipse.  The time of the eclipse will vary by location, but will be around midday on Monday, August 21.

As of today, inexpensive rooms are still available in Lincoln, NE, Kansas City, MO, Columbia, MO, Jefferson City, MO, St. Louis, MO, Paducah, KY, Nashville, TN, Greenville, NC, Columbia, SC, and Charleston, SC.  But I guarantee that will no longer be true in a couple of weeks!

Before I made my own hotel reservation last year, I did check on campground availability.  At that time, the campgrounds I checked were already sold out.  However, you may wish to check on campgrounds, including state parks on or near the path of totality.  (See the list of Nebraska State Parks at the end of this post.)

The links below are to the least expensive hotel in the area, as of June 16.  There might be other hotels that are more suitable or closer to the path of totality.  But this will give you an idea of what is available.

For constantly update hotel information, please visit the following posts:

City Lowest price City Percent Booked Link to Least Expensive Hotel
Salem, OR Not Available 100.00%
Jackson, WY Not Available 100.00%
Casper, WY $801 96%
1st Interstate Motel
Glendo, WY Not Available 100.00%
Alliance, NE Not Available 100.00%
Grand Island, NE Not Available 100.00%
Lincoln, NE $43.00 76.00%
Americas Best Value Inn Lincoln Airport
Kansas City, MO $42.00
Super 8 Lenexa Overland Pk Area
Columbia, MO $43.00 78.00%
Frontier Motel
Jefferson City, MO $50.00 Almost 100%
California Motel
St. Louis, MO $39.00
Motel 6 Hazelwood
Cape Giraredeau, MO Not Available 100.00%
Carbondale, IL Not Available 100.00%
Paducah, KY $180.00 98.00%
Wingfield Inn
Nashville, TN $50.00 72.00%
Super 8 Nashville Downtown
Greenville, NC $44.00
Days Inn Washington NC
Columbia, SC $42.00 74.00%
Budget Inn Express-columbia
Charleston, SC $60.00 93.00%
Econo Lodge North


Nebraska State Parks

It does not appear that there are any reservable campsites at Nebraska State Parks in the path of totality. But the following Nebraska State parks have sites available for reservation as of June 16. Most of these are north of the path of totality, some as much as a hundred miles or more. But for those visiting Nebraska from the north, one of these parks might be a good option, since you can camp there, and then drive to view the eclipse Monday morning.

  • Branched Oak SRA
  • Calamus SRA
  • Chadron SP
  • Eugene T. Mahoney SP
  • Fort Robinson SP
  • Fremont SRA
  • Lake Wanahoo State Recreation Area
  • Lewis and Clark SRA
  • Louisville SRA
  • Niobrara State Park
  • Platte River SP
  • Ponca SP
  • Rock Creek Station SHP
  • Two Rivers SRA
  • Willow Creek SRA


1937 Trailer “Private Address” System

1937JuneRadioCraft

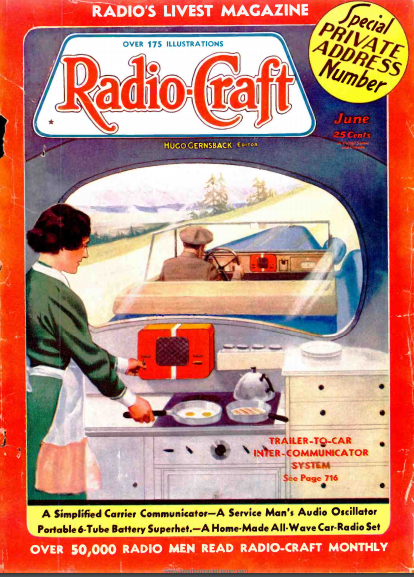
Eighty years ago this month, the June 1937 issue of Radio Craft offered this idea for how the radio man could make life easier for the owners of the nation’s 250,000 trailers. The issue is billed as the “private address” number, and contains a number of articles about “private address” systems, or what we would more commonly call intercoms.

In this case, the wife, unencumbered by the nuisance of seat belt laws, is busy cooking breakfast while her husband motors to their next campsite. If they need to talk, they have the convenience of a private address system, possibly including a radio.

The magazine suggests that the radio is best mounted back in the trailer, where it benefits from a greater distance from the car’s ignition system, and where it has the possibility of a larger antenna. The sound can be piped to the driver, to be interrupted only when told that it’s time to pull over for breakfast.


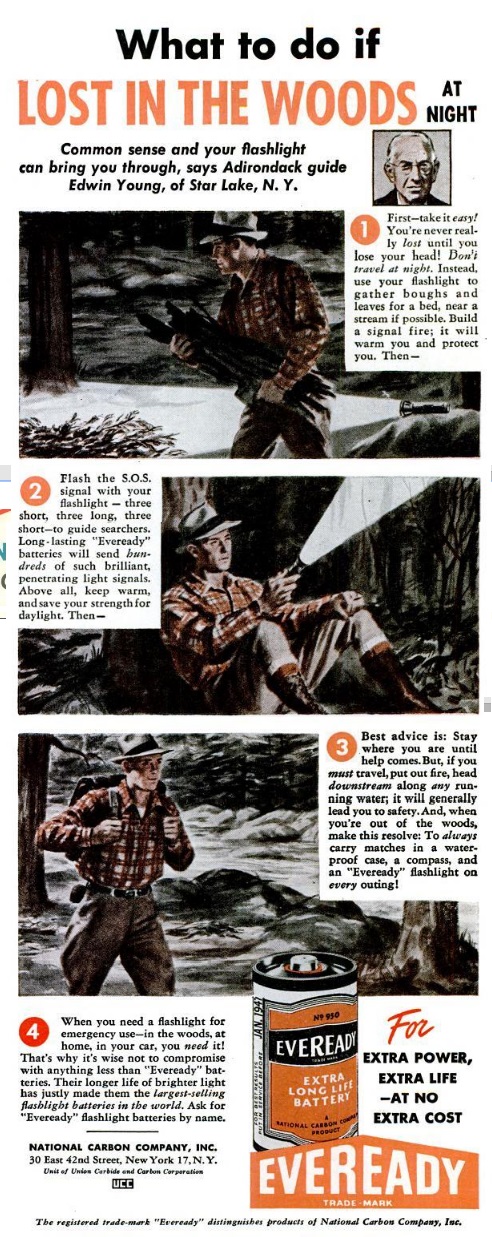
What To Do If Lost In The Woods At Night, 1946

Eveready1946

Seventy years ago, this day’s issue of Life Magazine, August 26, 1946, showed you exactly what to do if you were lost in the woods at night, courtesy of this advertisement by Eveready.

According to the ad, as long as you had common sense and an Eveready flashlight loaded with Eveready batteries, you would come through. The first piece of advice was that you’re never really lost until you lose your head. Therefore, the best course of action was not to travel at night. Instead, you should use your flashlight to gather boughs and leaves for a bed, and build a fire.

Once you made your primitive camp, the next course of action was to signal SOS with your flashlight–three short, three long, three short. This would guide searchers, especially if you had Eveready batteries, which would send hundreds of such brilliant penetrating light signals.

When morning came, the best bet was to stay put and wait for help to come. But if travel was necessary, you should douse your fire and follow any running water downstream.

In addition to the Eveready flashlight and batteries, the ad reminded that other survival necessities included matches in a waterproof case and a compass. These needs should be with you on every outing.

Click Here For Today’s Ripley’s Believe It Or Not Cartoon


Direction Finding With An AM Radio

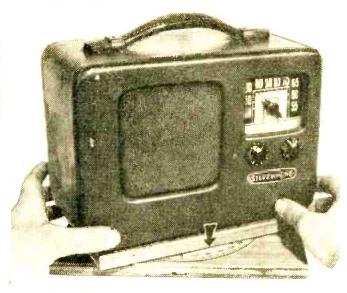
Portable radio mounted on base for direction finding.

Portable radio mounted on base for direction finding.

Sixty years ago this month, the July 1956 issue of Popular Electronics carried an excellent tutorial on how to use a portable AM radio for direction finding.

Most AM radios, both then and now, are very directional in that there is a “null,” or spot where the signal fades out, on each side of the built-in antenna.  You can demonstrate this by tuning to a relatively weak AM station and then slowly rotating the radio.  You will find that there are two spots, 180 degrees apart, where the station disappears or becomes very weak.  If the radio, like most portables, has an internal loopstick antenna, these are the points where the long narrow antenna is pointing directly at (or away from) the station.

You can use this principle to determine your location.  Even with a very cheap radio, you can usually establish your location with astonishing accuracy.

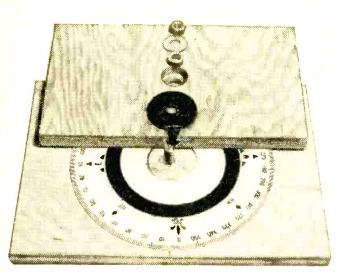
Detail of direction finding mount for portable radio.

Detail of direction finding mount for portable radio.

The Popular Electronics article shows how to construct a rotating mount for your radio.  You strap the radio in place, turn it for the minimum signal, and the pointer on the mount shows the bearing to or from the station in degrees.  For example, if the station’s null is at 45 degrees, then you can draw a line on a map over the station with that same angle from north.  In other words, in this example, running NE-SW.  Your current location is somewhere along that line.

By repeating this process with a second radio station, you will have two lines drawn on the map.  The point at which the two lines intersect is your current location, sometimes to astounding accuracy.

The mount shown in Popular Electronics is for a more or less permanent installation in a boat.  But this is not necessary.  In most portable radios, the antenna is mounted parallel with the outside case, usually with the longest side.  Therefore, it is possible simply to use the radio itself as a straightedge:  Align the map with the Earth, in other words, place the top of the map toward the north.  Then, rotate the radio so that the signal disappears.  With the radio at the same angle, place one edge over the station’s location and draw a straight line on the map.  Your location is somewhere along this line.

Then, repeat the process with a second station.  The point where the two lines come together is your location.  To confirm your location, you can repeat the process with a third station.  If the three lines come together very close to the same point, then you can be quite certain that the location was accurate.  If one of the lines doesn’t seem to agree, then you can repeat the process with a fourth station, and ignore the reading that doesn’t seem to match the others.

With a bit of practice, you can find your location very accurately.  In an urban area, by using 3 or 4 local stations, I have identified my location within a hundred yards or so.  In a rural area, where the stations might be further away, the accuracy will not be quite as great, but you should be able to locate yourself within a fraction of a mile.

The Popular Electronics article contains instructions on disabling the receiver’s automatic volume control (AVC), because in the case of a strong station, the radio might keep playing at full volume even with the station nulled out.  However, it is not necessary to modify the radio.  Most stations, unless they are very strong, will show a null even with the AVC functioning.  And for those stronger stations, you can compensate by tuning the radio slightly off frequency.  For example, if the station you are trying to locate is at 800 and you can’t get a null, you can reduce the signal strength simply by tuning to 810.  You’ll still hear the station with the radio properly oriented, but the signal will be weak enough that you will be able to detect the null.

Of course, for this method to work, you need to know the exact transmitter location of the radio stations you plan to use.  These often differ from the location of the station’s studio and office.  In some cases, they are many miles from the station’s city of license.

Fortunately, in the United States, this information is easy to obtain from the FCC website.  You can search for a particular station, for all stations within a state, or all stations within a certain radius of a given location.  When you click on the station’s call letters, you will be given the exact latitude and longitude of the transmitter.  (Transmitter locations of most AM stations are also shown on aeronautical charts, since pilots still use this method of direction finding.)

Direction finding, even with a very cheap AM radio, can give amazingly accurate results.  It is certainly not as convenient as other methods, such as GPS.  But in an emergency, it should not be overlooked as a backup method to determine your location.  It requires very little equipment (just a radio, map, and pencil).  It also requires a bit of practice beforehand, since you need to learn the characteristics of the radio you will use.  And it requires knowledge of the location of some local transmitters.  But if you can locate those transmitters on your map, you can also locate yourself.

As I mentioned, I’ve been able to determine my own location within a hundred yards by knowing the exact locations of local radio stations.  But even without an exact knowledge of their location, I was able to locate myself, at night, within about 30 miles, simply by using the approximate location of strong distant stations.  For example, I know that WBBM’s transmitter is in or near Chicago.  I know that WSM’s transmitter is in or near Nashville.  I know that CFZM’s transmitter is in or near Toronto.  Even though I did not know the exact locations of these transmitters, when I used this method at night, I was able to locate myself within about 30 miles.  There’s probably little practical application for doing it this way, since it’s unlikely that someone would find themselves not knowing what state they are in.  (However, it should be noted that before the invention of accurate chronometers, most mariners wouldn’t know their location that accurately.)  But it is still rewarding to know that you can determine your location on Earth with such primitive equipment.

Click Here For Today’s Ripley’s Believe It Or Not Cartoon


Product Review: Wise Food Storage “Savory Stroganoff”

One of this site’s advertisers is Wise Food Storage, who recently sent me a free sample to review.  The company supplies dehydrated food for emergency food storage, camping, and backpacking.  On their website, they sell mostly packages consisting of assortments of food, such as the package shown below, which is billed as providing enough food for two people for 72 hours:

72 Hour Kit for 2 PeopleTHe sample I was sent was a single meal, namely their “Savory Stoganoff.”

I was initially a bit skeptical, since my experience has been that most suppliers of “survival” food seem to charge a considerably higher price than one would pay for comparable items at the supermarket.  In many cases, they hide the higher price by making inflated claims as to how long the product will last.  For example, some companies offer a “30 day supply” of food, but if you look carefully, you realize that you would be eating starvation rations for those thirty days.

It was refreshing to see that Wise doesn’t follow this same practice, and the claims on their website are reasonable.  A normal diet consists of about 2000 calories per day.  You can certainly survive on less, but if you want to replicate a normal diet as much as possible during an emergency, you should plan on having about that many calories per day per person.  And Wise seems to use honest figures on their website.   For example, the 72 Hour Kit for 2 People shown above supplies over 13,000 calories, which is indeed enough to feed two people for three days, with their normal caloric intake.  In fact, with a bit of scrimping, it would probably last even longer than advertised.  It is refreshing to see a company that didn’t fall into the trap of making exaggerated claims.  As you shop around, you might see lower prices.  But before you buy, make sure you’re really getting the number of days’ supply that the company is claiming.  In Wise’s case, you are.  In the case of some other suppliers, you are not.

I’m not normally a fan of “kits” for food storage.  From a price point of view, you’re probably better off buying normal food from the supermarket.  You’ll know that they are items you like to eat, the cost will be lower, and the supermarket has many items that can be stored for a long period of time, especially if you rotate them into your family’s normal diet.  On my food storage basics page, I have ideas for emergency food storage using items available at any supermarket.

On the other hand, there is something to be said for buying a well thought out “kit.”  You know that everything is optimized for long-term storage and minimal preparation.  And there’s something reassuring about looking at a single container and knowing that it will give you enough food to eat for X days.  I wouldn’t recommend a kit as your family’s sole source of emergency food, but they do have their place.  In addition to Wise’s 72 Hour Kit, they have a variety of other similar assortments. such as a 1 Month Emergency Food Supply for 1 Person – 56 Servings and a 2 Week supply geared for backpackers.  Again, you can probably put similar kits together yourself at a somewhat lower price, but for some people, the convenience is worth it.

Package of Savory Stroganoff being reviewed.

Package of Savory Stroganoff being reviewed.

Wise’s website doesn’t seem to sell individual meals, but they are available from WalMart.  For example, you can purchase a single package of the “Savory Stroganoff” reviewed here.  The price is quite reasonable, and you can order online and have it delivered to a local WalMart, so there is no shipping cost.

The Savory Stroganoff I reviewed exceeded my expectations.  I wouldn’t describe it as a gourmet meal, but it was reasonably good tasting, easy to prepare, and would be quite adequate during an emergency or while camping.  The nine-ounce package was billed as having a storage life of 25 years.  It was packaged in a heavy plastic pouch with an oxygen absorber inside (and I’ll say more about the oxygen absorber in a moment).  According to the nutrition facts, the package supplies four servings of 250 calories each.  In other words, the one package contains a thousand calories, or about half of one person’s caloric needs for the day.  We did feed four people lunch using the one pouch, and the meal was filling.  Each serving contains 45 grams of carbohydrates, 4.5 grams of fat, and 7 grams of protein, so it’s a reasonably well balanced meal by itself.  The vitamin content is relatively low, supplying 0% of the daily requirement of vitamin A, 2% of the daily requirement of vitamin C, 8% of the calcium, and 8% of the iron.  During a short-term emergency, vitamin deficiency isn’t an issue, but those planning for a longer-term emergency would be well advised to include some multivitamin tablets if relying on this kind of storage food.

The main ingredient is the pasta, along with nondairy creamer and textured vegetable protein.  You can view the full list of ingredients and nutrition facts at the WalMart website.

Preparation was very straightforward, and we followed the instructions on the package exactly.  You start by boiling four cups of water, turning off the heat, and then adding the contents of the package to the boiling water.  We used the stove, but the water could be boiled by any emergency heat source.  Since the only actual cooking is the boiling of the water, there’s really nothing that can go wrong.  You simply cover the pot and wait 12-15 minutes.

The glitch in the instructions was that it didn’t mention the oxygen absorber inside, so we wound up pouring it into the boiling water, where we had to fish it out.  But other than this oversight, the instructions were self-explanatory.

After 15 minutes, you remove the cover, and let it stand for another 2-3 minutes.  We used a normal kitchen pan, but any container with a lid could be used.  In an emergency, to minimize the amount of cleanup, I would boil the water in one container, and then “cook” the food in some kind of disposable container.

The completed Stroganoff.

The completed Stroganoff.

The finished product didn’t look particularly appealing.  Perhaps it would have looked better if we had let it sit a while longer, but it was rather watery.  It looked more like a thick soup than Stroganoff.  It was best served in a cup or bowl and eaten with a spoon.

However, it tasted quite good, and neither my wife and I nor our kids had any complaints.  It did not have the “dehydrated” taste that I feared it would have.  It tasted like noodles and sauce.  There was a bit of seasoning–I noticed that the ingredients included dried onions.  However, it was rather bland, and adding a little bit of salt and pepper improved it considerably.  My daughter added a little bit of Knorr chicken bouillon, and she reported that this made it taste quite good.  So my main advice if you’re going to rely on prepackaged items like this, it would be a good idea to also include familiar seasonings.

In summary, the stroganoff tasted better than I expected without a “freeze dried” taste, and was more reasonably priced than I expected.  It’s more expensive than comparable supermarket items, but much less expensive than comparable items billed as “survival” or “backpacking” food.  I probably won’t order one of Wise’s food “kits,” but I’ll probably purchase a few packages of the stroganoff and other meals to keep in the camper, or just to keep in the house for times when a relatively quick meal is needed.

Full Disclosure:  The product reviewed was supplied to me free of charge by Wise Compnay, one of this website’s advertisers, in exchange for an honest review.  All product links on this page are affiliate links, meaning that if you click on the links and purchase the product, I will receive an advertising fee.

Click Here For Today’s Ripley’s Believe It Or Not Cartoon


Free Shipping on all Wise Food Storage Products!


National Parks On The Air “Park To Park” QSO

Photo of bridge at Chickasaw National Recreation Area

Chickasaw National Recreation Area, Oklahoma. NPS photo.

I had my first “park to park” QSO today in the ARRL National Parks On The Air (NPOTA) event.  On the way to do some grocery shopping, I decided to make a quick stop near the Mississippi River, at a parking lot just south of Summit Avenue on the St. Paul side of the river.  It’s at a fairly good elevation above the water, but it’s within the required 100 feet of the river.

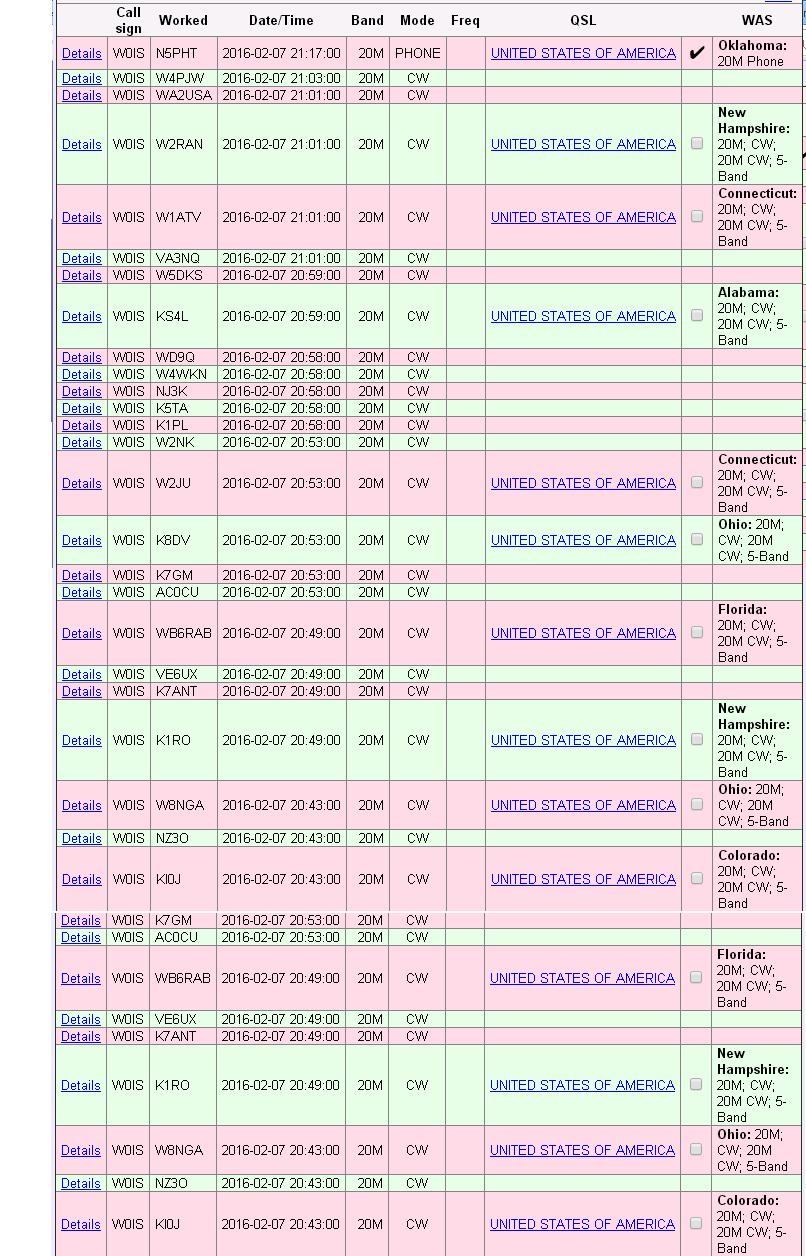
I worked about 35 contacts on 20 meter CW in about a half hour, as shown in the log below.  When the pileup subsided, I decided to try phone.  In a previous “activation” from this location, I had managed to work about 50 contacts, but that was after I was “spotted” on the DX cluster.  Without that help, my 5 watt signal didn’t attract anyone’s attention on the crowded band, and I called CQ for about 10 minutes without any takers.  Before packing up, I decided to tune the band and look for any other strong signals.

After a few minutes, I heard Gary, N5PHT, who I had already worked a few times from home.  He was operating from a campground at the  Chickasaw National Recreation Area in Oklahoma.  He had a booming signal and easily pulled my weak signal out of the noise.

Gary’s station is described on his website.  The difference in signal is attributable to the fact that he is running 100 watts to a better antenna, with a nice station set up in his motorhome.  Even though he was portable, he had a formidable signal, and has worked about 2000 contacts in about a week from this portable location.


npota020716


The Real Reason Scouting Is Important

MeasureDistancePeople sometimes ask what is the most important thing that youth learn from Scouting. They usually expect to hear something along the lines of that it “builds character.” In some cases, it is probably true that Scouting builds character, but I honestly can’t point to too many people who would have wound up being bad characters if they hadn’t been in Scouting.

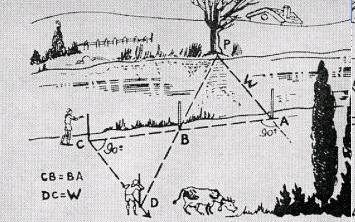
A better reason why Scouting is important is summed up in this diagram, which appeared in Boys’ Life magazine 70 years ago, February 1945.  That’s not to say that measuring the width of a river is a particularly important skill in the scheme of things. In fact, I don’t recall ever being taught this particular method. But it’s illustrative of something I did learn, without knowing that it was being taught. What I really learned was that when I’m faced with some obstacle, it is usually possible to achieve the desired result, by applying a little bit of thought. But the first step is to know that there is a solution to the problem. Once a person realizes that, then finding the actual solution (or more often, one possible solution out of many) is usually pretty simple.

In this illustration, the Scout needs to know the distance across the river. The article, written by William “Green Bar Bill” Hillcourt, explains the method being used here. He starts at point A, which is directly across the river from a given point with a convenient object, in this case, a tree. He then walks along the river a set distance, such as 100 paces, and places a stick at that point. He then keeps walking that same distance. When he reaches the point marked C, he walks at a right angle, and keeps going until he’s along the same line containing the tree and the stick. At that point, the distance he’s walked away from the river is equal to the width of the river.

There are certainly other methods to figure out the distance, another one of which is also shown. But one method, which seems to be the most commonly used these days, is to consult outside information. It’s usually possible to ask someone who knows the answer. And it’s even possible to go to Google Maps, look at the image, and get the exact width. Those are very valid methods, and in many cases, they are more convenient and better methods. But the Scout learns that they are not the only methods. Even if outside assistance is not available, it is possible to figure things like this out on your own, without outside help.

I never really realized this until a few years back, when I started hearing from RV’ers that they couldn’t possibly camp in a non-electric site. I happen to enjoy the convenience of electric power, and if it’s available, I gladly take advantage of it. But I don’t view it as a necessity. When pressed, these people invariably come up with the same rationale for needing electricity: They need it in order to plug in their electric coffee maker.

Now, I drink a lot of coffee, and I probably drink more coffee than most of those people. So I understand their need for coffee. But I also realize one thing that they don’t know: I know that there are many methods of making coffee that don’t involve the friendly local electric utility. In response to their concerns, I even created a website entitled “How To Make Coffee Without Electricity.”  That website is written in a somewhat tongue-in-cheek style. But it’s also full of information that people don’t know, even though I always assumed that it was just common sense. It’s probably common sense to me because I was in Boy Scouts. I know that I can figure out the width of a river even if Google Maps is unavailable. So it stands to reason that I can figure out how to make coffee even if the power happens to be out.

There must be a lot of people who weren’t Scouts. Whenever a hurricane is bearing down on some part of the English-speaking world, my coffee page starts to get hundreds of hits. A day or two before the storm, these are from desktop computers. The day after the storm makes landfall, the number of hits increases, but most of them are from mobile devices. In other words, the power goes out, and only then they realize that they don’t know how to make a cup of coffee. I’m glad their mobile device is still working, and I’m glad that Google is still working, and I’m happy to impart my lifesaving knowledge that it is, indeed, still possible for them to make a cup of coffee.

But I worry about these people if Google ever becomes unavailable for some reason. Maybe they should have been Boy Scouts. I’m sure these people are of fine character, and they didn’t need Scouting to build it. But learning the lesson that self-reliance is usually possible probably would have served them well.

Click Here For Today’s Ripley’s Believe It Or Not Cartoon


The Travelpod: 1970’s Most Versatile Camper

Travelpod

Here’s an idea from 45 years ago that somehow never caught on. It’s the Travelpod, from the February 1970 issue of Popular Mechanics.

TravelpodBoatIt’s a camper, it’s a boat, and it’s a car top luggage carrier, all in one. The author must have built two of them, since the yellow one is shown on top of the station wagon, and the blue one is shown in the water. Complete plans were available from the publisher, and you could even get custom decals for an additional 50 cents.

According to the author, the Travelpod could be built with about $125 in materials. After an 8500-mile camping trip with the family, he reported that it was the most versatile and most functional camper on the road.

Click Here For Today’s Ripley’s Believe It Or Not Cartoon