Category Archives: Radio history

1938 Two-Tube Shortwave Regen

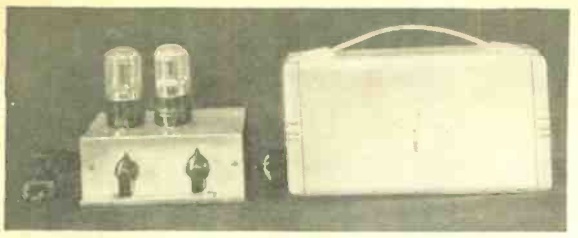
1938FebPS11938FebPS2The February 1938 issue of Popular Science carried the plans for this two-tube regenerative shortwave receiver.  While absent from the schematic diagram, the globe on the top was critical, since it allowed the shortwave fan to quickly spot the location of every new station logged, and easily spot the location where the message originated.

The circuit inside the box employed two type 30 tubes, one serving as regenerative detector, with the other serving as AF amplifier. Since regeneration operated more smoothly at a reduced voltage, the set employed two B batteries. A 22.5 volt battery powered the detector, with a 45 volt battery allowing for extra volume from the amplifier stage.

The cover of the set was hinged, to allow for changing the plug-in coils.

1938FebPS3


1958 Boys’ Life Shortwave Receiver: Part 2

WB3HLHradioWe recently wrote about this three-transistor regenerative receiver from the January 1958 issue of Boys’ Life magazine.

I just received this picture of the completed receiver, constructed by Tom, WB3HLH, of Rockville, Maryland.

As a Cub Scout, he saw the receiver in the magazine and was very interested. This is understandable, since the magazine also carried a feature extoling the virtues of SWL’ing, as well as a listing of the prizes in the annual radio contest.

About 50 years later, he located the magazine and took it upon himself to make one. The article noted that the set was not for beginners, and his experience agrees with this assessment. He notes that the audio stage was simple, but it was very tricky to get the detector oscillating.  As you can see, he very carefully duplicated the layout of the original project.

In addition to the coils described in the article (wound on plug-in coil forms), he wound a coil for the broadcast band. He reports that the set performs well on shortwave, both for broadcast and SSB signals. On the broadcast band, it pulls in all of the major East Coast stations, and signals as far west as KMOX in St. Louis.

The article calls for the use of four penlight batteries, but he reports using a 9 volt battery. The only other circuit modification is the addition of a 3.3 k resistor in parallel with a .01 uF capacitor on the emitter of the detector transistor.


Solar Fire Starter

1980SolarLighterWhen I worked for Radio Shack in an earlier lifetime, one of the more interesting products we sold was the solar cigarette lighter. It was something of a novelty item, but it was also fully functional. It was nothing more than a parabolic mirror, with a little holder at the focal point.  It’s shown above in the 1980 Radio Shack catalog. The idea was to place a cigarette in the holder, point it at the sun, and after several seconds, the cigarette would start smoldering. No, it didn’t work at night or on cloudy days, but on a sunny day, it worked flawlessly.

The same simple device is now available at Amazon.  Taking inflation into consideration, it’s not much more expensive than it was back in the day, and would serve as one method of starting a fire in an emergency. Yes, you’re better off if you have matches or a traditional lighter with you, but redundancy can be a good thing, and it’s kind of fun to amaze your friends by lighting a fire using solar power.

If you don’t smoke (this is one rare case where a cigarette could save your life), then you could use other similar tinder, such as tissue paper, dry grass, or leaves. This device won’t cause anything to burst into flame, so you’ll need more tinder at the ready. As soon as whatever you lit starts to smolder, you’ll need to transfer it to a larger pile of tinder, and then blow on it until it bursts into flame.  You then keep adding larger fuel until you have a fire of the desired size.  You don’t want the fire to go out after it gets dark, because obviously you won’t be able to light another one until morning.

(Some links on this page are affiliate links, meaning that we get a small advertising fee if you purchase from Amazon after clicking on the links.)


1968 QRP Rigs

1968JanRadTvExpFifty years ago this month, the January-February 1968 issue of Radio TV Experimenter devoted a considerable number of its pages to Amateur Radio QRP (low power) operation.

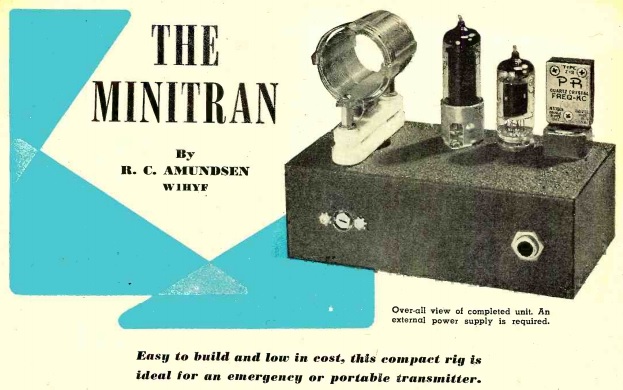
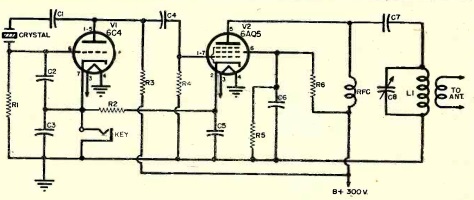
At the time, “QRP” generally referred to power levels of under 100 watts, but the introductory article by Robert M. Brown, K2ZSQ, revealed that many in what was known in ham circles as “that crazy QRP crowd” were seeing what could be done with flea-power setups, often consisting of a single transistor, IC, or tube.  He included these diagrams of minimalist one-transistor QRP transmitters:

1968JanRadTvExpSchematics

The cover feature was the “Mini-Mite,” a QRP transmitter designed by Howard Pyle, W7OE. This was a 4-band transmitter for 80, 40, 20, and 15 meters. The author reported that the set ran an input power of 1.2 watts with a 6 volt power supply, or up to 1.8 watts with a 9 volt supply. His best DX was 1100 miles on 15 meters, 600 miles on 20, 300 miles on 40, and a respectable 200 miles on 80.

1968JanRadTvExpIntlXtalThe transmitter actually consisted of four transmitters, since it used four of the ubiquitous International Crystal oscillator module kits, and ad for which is shown here from the same magazine. The oscillator cost $2.35, and an additional $3.75 for the necessary crystal. Essentially the oscillators, even though designed for test circuits, were functioning as transmitters, with just a bit of external matching network before the antenna. To switch bands, one transmitter was switched out of the circuit, and one for another band switched in.

It should be noted that it’s likely that none of these 1968 circuits would meet modern spectral purity requirements. Chances are, a bit more external filtering would be required. But the concept shown here is recognizable in many minimalist QRP rigs that are once again in style by “that crazy QRP crowd.”


1950 Soviet “Simplest Shortwave Receiver”

SovietSWReceiverBookCoverWe previously promised that we would be showing you more of this fascinating little book, and here it is!

The book in question is the 1950 Soviet book Простейший коротковолновый приемник (The simplest short-wave receiver) by V.A. Egorov, UA3AB,  part of the series Библиотека юного конструктора (Library of the young designer), a series of small books published between 1937 and 1964 showing various construction projects, many related to radio.

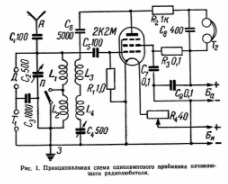
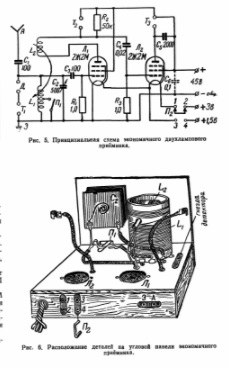
SovietSWReceiverBookSchematicAfter a few pages of introduction to shortwave radio, the book jumps right into a description of the circuit.  As the title of the book promises, the receiver is simple but elegant.  It uses a 6Н9М dual triode (that’s Cyrillic text, so you would read it as 6N9M), one half being used as regenerative detector, with the other half as audio amplifier.  The set employed plug-in coils, and was designed to tune the 40 and 20 meter ham bands.  (For those wishing to duplicate the set with Western parts, the tube appears to be equivalent to a 6SL7.)

The neatly constructed final product is shown below:SovietSWReceiverBook2

SovietSWReceiverBook1

If the book were published in the West, it would probably end there, along with a reminder that you needed to go to your friendly radio dealer or even drug store to buy a B battery for the plate voltage, and an A battery to light the filament.  But in the Soviet Union, it probably wasn’t a sure thing that you could find the battery.  So the book describes four methods to get the power.

The first two methods are power supplies that the reader could build, both of which are more complex than the receiver itself.  Both rely mostly on factory-made parts, but the second set of plans includes instructions for winding the filament transformer at home, with the B+ being rectified directly from the AC line:

SovietSWReceiverBookPS1

SovietSWReceiverBookPS2But even if the aspiring young Soviet radio fan wound his own transformer, getting the rectifier tube could be problematic.  Therefore, the third method of powering the receiver could be very attractive.  Chances are, the home was already equipped with a broadcast radio, and the broadcast radio had a perfectly good power supply inside.  So the third method involves simply tapping into it by unplugging one of the tubes, and powering the shortwave set right from the socket.  The young SWL just needed to locate the 6Ф6 tube in the family radio, remove the tube, plug his radio into the socket, and his radio would come to life!  Presumably, the other family members would be supportive of the SWL’s new hobby, and forego listening to the broadcast radio as he tuned the short waves.

SovietSWReceiverBookPS3

The fourth method recognizes that some builders might have enough connections so that they can simply go out and buy the battery.  In this case, a БАС-80 battery is required.

After recommending an antenna of 25-30 meters in length, the book jumps into some discussion of how to tune the amateur bands.  It notes, for example, that the 40 meter band can be expected to yield stations about 900-1000 kilometers away, with 20 meters pulling in stations more than 1000 km distant. It explains some of what the listener will hear. For example, in addition to listing some foreign call sign prefixes, it notes that UA call signs are in the RSFSR, UB calls are from Ukraine, and so forth.

It mentions some example SWL call signs, and even shows a reproduction of an SWL card from an SWL in Belarus, with the call sign of UC-2-2002, complete with the familiar address of Box 88 Moscow. Presumably, the text explains exactly how the young listener goes about getting such a call sign and getting his SWL cards printed, but I’m unable to read the text.

SovietSWReceiverBookPSswlcard

The book concludes with a table showing common Q-signals, common CW abbreviations, and the following listing of Soviet and European call sign prefixes.

SovietSWReceiverBookPSprefixes

The UA-UR prefixes for the various Soviet republics are listed at the left, with the right column showing the prefixes of Czechoslovakia, Romania, Bulgaria, Hungary, France, Belgium, Finland, Denmark, Italy, Britain, Sweden, Holland, Norway, and Germany.

The SWL card shown above is for reception of UA3AB, and a search for that call sign reveals that it was held by the author of the book, V.A. Egorov.

You can read more about this receiver at this link at the site of VA3ZNW (ex-UA3ZNW, ex-UA3-117-386).  He has a fascinating story of building this set in the 1970’s at the age of 13, and using it to tune in the Voice of America and Radio Liberty.  Even though the Soviets extensively jammed those stations, they didn’t bother jamming them on 16 and 13 meters, since Soviet receivers didn’t tune those bands.  But with the little one-tube homebrew set, they came in loud and clear.


1948 One Tube Broadcast Set for Beginners

1948JanPM31948JanPM4Seventy years ago this month, the duo shown here are working on a one-tube broadcast set shown in the January 1948 issue of Popular Mechanics.  The set used a dual 6SL7 tube as regenerative detector and audio amplifier.  It was built on a wooden ladder-style chassis, allowing the tube and coil sockets to be mounted neatly without need of any drilling.

The set was the first in a series of progressive receivers.  As later issues of the magazine came out, the parts could be re-used to make more complex designs.

1948JanPM5


Three 1943 One-Tube Receivers

1943JanRadiocraft1

The January 1943 issue of Radio Craft magazine contained the plans for no less than three one tube receivers, the first of which is the unusual looking set shown above, dubbed by the magazine as the “Simplicity 1.”

In addition to being designed around the concept of simplicity, the set dealt with parts shortages. In particular, variable capacitors were hard to come by. Therefore, tuning was accomplished with a “capind,” a component which combined capacity plus inductance. In other words, it was a combined variable capacitor and variable inductor, all in one component.

The “capind” consisted of a coil carefully wound over a wooden dowel, covered by an extremely thin paper sleeve. That was covered by a piece of tin foil, which served as the capacitor. The assembly is shown below:

1943JanRadiocraft2

1943JanRadiocraft3The set was regenerative, and the young woman in the photo above is adjusting the regeneration by adjusting the “throttle” condenser, which is a homemade tubular capacitor.

With the use of these homemade parts, the cost of the set (not including 1G6G tube and batteries) was said to be less than a dollar.

1943JanRadiocraft4The second set featured by the magazine, shown at right, is slightly more advanced, contains a conventional tuning capacitor, and was capable of tuning the short wave bands through the use of four plug-in coils.

This set employed the same 1G6G tube, and used a variable resistor to adjust regeneration.  The use of a 35-75 foot antenna was recommended.

1943JanRadiocraft5


Finally, in response to requests by “several readers,” the magazine reprinted the schematic of the “Pigmy Receiver” which had originally appeared in the magazine’s June 1940 issue. This set used a single 117L7, one half of which served as rectifier, with the other half serving as detector.

You will note that only one wire is connected to the line cord, which the magazine describes as a “Safety First” method of plugging it in. The other power connection is through the thoroughly grounded chassis. With the cord plugged in the wrong way, the set would not light. Of course, this circuit would trip a modern ground fault interrupter circuit, but it would be a relatively safe way of operating a radio directly off the line current.

1943JanRadiocraft6


1958 Boys’ Life 3-Transistor Regen


1958JanBL1958JanBL1The January 1958 issue of Boys’ Life magazine carried the third part in a series about shortwave listening, and included the plans for the three-transistor shortwave receiver shown here. The construction article was authored by Howard McEntee, W2SI, who was also the designer of the magazine’s 1956 CONELRAD receiver.

The shortwave set covered 1.25 to 18.5 MHz with four plug-in coils, meaning that it could tune the top of the broadcast band, several shortwave broadcast bands, and the 160, 80, 40, and 20 meter ham bands.  It employed a 2N1114 as the regenerative detector, followed by two CK722‘s for audio amplification to drive a pair of headphones.  It was powered by four penlite cells, which were said to provide several hundred hours of use.

Tuning was accomplished with two variable capacitors, one for broad tuning, with another for bandspread for carefully tuning a crowded band.  A third variable capacitor was used to adjust regeneration.

The article cautioned that this set wasn’t necessarily for beginners.  It advised that those who had never built a radio before should start with a more simple set and then graduate to this one.  “Real care is needed in wiring, for a wrong connection in some parts could mean immediate ruin of over $10 worth of transistors, the finished job shoujld be checked and rechecked, before the power is turned on.”


1958JanBL2


1952 and 1954 Solar Eclipses

SovietEclipseCoverMillions of Americans were able to witness the Great American Eclipse of 2017 or will be able  to see the eclipse of April 8, 2024.  The 2017 eclipse crossed the United States from northwest to southeast, and the 2024 eclipse will run from southwest to northeast.  The Soviet Union had a similar pair of eclipses on 25 February 1952 and 30 June 1954.  The intersection of the two American eclipses is near Carbondale, Illinois.  The paths of the two Soviet eclipses had their intersection at a point in northern Iran, just south of the Caspian Sea.

SovietEclipseMap

The illustrations shown here are from a Soviet booklet published in 1950.  In addition to discussing solar and lunar eclipses generally, it contains information about the two Soviet eclipses of the 1950’s, including the map shown above.  It also contains a table showing all total solar eclipses worldwide through 1999.

The booklet, Солнечные и лунные затмения (Solar and Lunar Eclipses) by Prof. A.A. Mikhailov, part of the series Научно-популярная библиотека (Popular science library), reveals that the path of the 1954 eclipse came very close to a number of Soviet cities, including Kaliningrad, Vilnius, Minsk, Kiev, Rostov, and Baku.   The 1954 eclipse had also been visible in the United States, starting at sunrise in Nebraska, and passing over South Dakota and Minnesota (including Minneapolis and St. Paul).  It then passed over Canada, Greenland, a tiny portion of Iceland, Norway, and Sweden, before entering the Soviet Union near Kaliningrad.

The 1952 eclipse, after passing over Africa, went over a less populated area of Turkmenistan, Uzbekistan, Kazakhstan, and Asiatic Russia.

This video shows the 1954 eclipse from Minneapolis:

This page contains a reminiscence and photo of the same eclipse from Kiev.  The Google translate function does an admirable job of making it readable in English.

One of the scientific observations made during the 1954 eclipse was the measurement of radio emissions by the sun on various frequencies, documented in this 1955 article in the journal Astrophisica Norvegica, vol. 5, p. 131.  The graph below shows the signal as received in Vesterøya, Norway, on 200 MHz.  As would be expected, the solar noise reaches a minimum value at the time of total eclipse.

1954EclipseRadio

Information on how to form a Minnesota LLC.


1933 Crystal Set with Piggly Wiggly Detector

1938JanTVNews

1938JanTVNews1Shown here is a very basic crystal set mounted in a tobacco can, as shown in the January 1933 issue of Television News.

The design for this well-constructed little set apparently originated in a Danish magazine, and was adapted by one Clifford E. Denton, who put it together in a couple of hours one evening. The variable capacitor, shown as C1 in the close-up picture here, was a compression type. The plates did not rotate. Instead, the screw was turned to compress the capacitor, with an insulating material to keep the plates from shorting out. This component was known as a “variodensor.” The coil could be purchased, or made at home on a wooden form.

The most notable feature of this set was the fixed detector, bearing a brand name that apparently never quite made it in the world of radio. The detector was a “Piggly Wiggly crystal detector.” The magazine described the Piggly Wiggly as “much better than the old-fashioned open detector, the crystal itself and the cat-whisker being enclosed in a neat molded bakelite case.” It could be adjusted by means of a “little red button” on the outside.

1938JanTVNews2