Automatically Timed Stove and Radio

Eighty-five years ago, this thoroughly modern housewife made sure she didn’t miss her favorite program. The timer on the electric stove was primarily designed to control three cooking circuits on the stove. But she was also able to plug in a radio to make sure it came on at just the right time. The picture appeared in the October 1940 issue of Popular Mechanics.


Electronics Merit Badge, 1965

As shown in this announcement in the October 1965 issue of Boys’ Life magazine, the Electronics Merit Badge (along with Space Exploration) is sixty years old. Metallurgy was also new that year, but was renamed Metals Engineering in 1972 and then discontinued in 1995.

Radio Merit Badge (originally named Wireless) was one of the original merit badges.  It continues (we happen to be a counselor for that merit badge), but Electronics covers some distinct material.  The design of the badge (a PNP transistor) remains the same today.

For an interesting story about the Space Exploration Merit Badge, read this account of an Ohio scout who earned it,


Fixing Windshield Washer on 2014 Dodge Journey

The new nozzle, as installed.

I recently had to replace the windshield washer nozzles on my 2014 Dodge Journey. My son helped me, but it was an extremely easy and inexpensive job.

Previously, the hose running to the nozzles broke at the point right where the hood hinges. I replaced that originally with a piece of tubing and two hose clamps. It leaked somewhat, but it worked well enough. But eventually, the connections to both nozzles broke, and it stopped working entirely. So, of course, I went to YouTube and found this video, which shows the entire repair process:

Interestingly, mine broke in exactly the same three places, and other people reported that theirs also broke in those three places. Armed with the knowledge of how simple the project was, I ordered the replacement parts on Amazon.  I probably could have found the nozzles at an auto parts store, but for probably less money, the Amazon kit included all of the parts that I might potentially need to do the repair.  As you can see from the

Leftover parts from kit.

unused parts at left, it included as much hose as might be needed to do a complete replacement, as well as enough fittings, just in case I needed to replace everything.  According to the Amazon listing, the same parts are used on a number of Chrysler vehicles, including the following:   2008-2017 Grand Caravan, 2007-2012 Caliber, 2001-2010 Chrysler Pt Cruiser, 2005-2010 Chrysler 300, 2005-2010 Jeep Grand Cherokee, 2008-2015 Patriot,  2009-2010 Dodge Ram 1500 2500 3500 Pickup, 2006-2010 Dodge Charger, 2007-2016 Journey, 2011-2017 RAM 1500 2500 3500 4000, 2008-2011 Dodge Avenger, 2004-2009 Dodge Durango.  The OEM part numbers are 5116079AA, 4805742AB, 5113049AA, 5303833AA, 55077460AA, 5160308AA.

Old broken nozzle.

The repair job is very simple.  If you examine the new nozzle, or the old nozzle shown at right, you can see that you just need to push a tab, and the whole nozzle then slides out from the top of the hood.  You can’t see where the tab is, but it’s an easy matter to find it by pushing a screwdriver into the hole, as shown at left.

You then place the included gasket on the new nozzle, and snap it back in to the hole.  You then simply slide the old hose onto the nozzle.  If the old hose is no good, you can replace it with the new hose that comes with the kit.

I could have lived with the leak near where the hood hinges, but we decided to fix that as well.  Unlike the old tube I had found at the hardware store, the new one was just the right size and flexible enough to make a tight fit over the two pieces of original hose.  The hose clamps probably weren’t necessary, but since I had them, I just put them back on.

The new nozzles aren’t quite as good as the original ones.  I think they are designed for a sedan, and don’t spray quite high enough for the Journey.  But they do the job, and they should be good for another 11 years of service.


Some links on this site are affiliate links, meaning that this site earns a small commission if you make a purchase after using the link.

1955 Hybrid Tube-Transistor Radio

Seventy years ago, the transistor was still the new kid on the block, and designers had to work around its limitations. It was hard to get it to work as a radio detector stage, so this design, from the September 1955 issue of Radio-Electronics dealt with the problem by using a hybrid circuit. A subminiature CK7088 pentode was used for the regenerative detector, and a transistor was used to amplify the audio. The circuit called for a Texas Instruments type 200, but the venerable  CK722 could be used with some modifications to the circuit.


Radio Assisted Fishing, 1925

A hundred years ago this month, the September 1925 issue of Radio News showed this method of attracting fish. The accompanying article claims that the fish liked the music, came in flocks, and the fisherman could hardly keep up with pulling them in. But we suspect the article was facetious, and the cover photo is more likely what would happen.


Simple Ranch Dressing Biscuits

x

My wife and daughter came home from Girl Scout camp with a bunch of leftover Ranch dressing, so I Googled to find recipes to use it. One site suggested biscuits, so that was all the inspiration I needed. I figured I could do it with just three ingredients, the ranch dressing, flour, and baking powder. And if I do say so myself, they turned out well.

The batch shown here used about a cup of flour, and about a tablespoon of baking powder. (You could also use self-rising flour or Bisquick, and not bother with the baking powder.) Then, start adding Ranch dressing. Start with too little, mix it together (with a spoon works just fine), and keep adding until it’s the right dough-like consistency.

Preheat the oven to 350 degrees Fahrenheit (175 Celsius).  Put lumps of dough on a baking sheet as shown at left(it doesn’t need to be greased) and bake for about 15 minutes.  The taste is actually somewhat reminiscent of the biscuits served at Red Lobster, so I hope I didn’t spill any trade secrets.

I don’t know what brand of Ranch dressing this is, but I’m sure other brands would work just fine. It might not be economical to buy Ranch dressing just to make biscuits (although, if you get a cheap enough brand, it just might be). But if you have a bunch of leftover Ranch, it’s a delicious way to use it up. And in the event of an emergency, and that’s what you have in your fridge, it would be a good option.

Bon apetit!


Some links on this site are affiliate links, meaning that this site earns a small commission if you make a purchase after using the link.

1925 Radio at the Beach

As demonstrated by these young women a century ago, a popular activity in 1925 was listening to the radio on the beach. The illustration appeared on the cover of the September 1925 issue of Radio Age.


1950 (and 2025) Five-Tube Backpacking QRP Transceiver

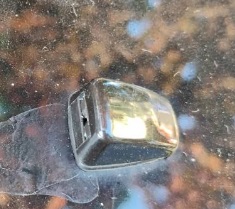
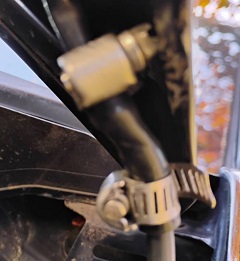
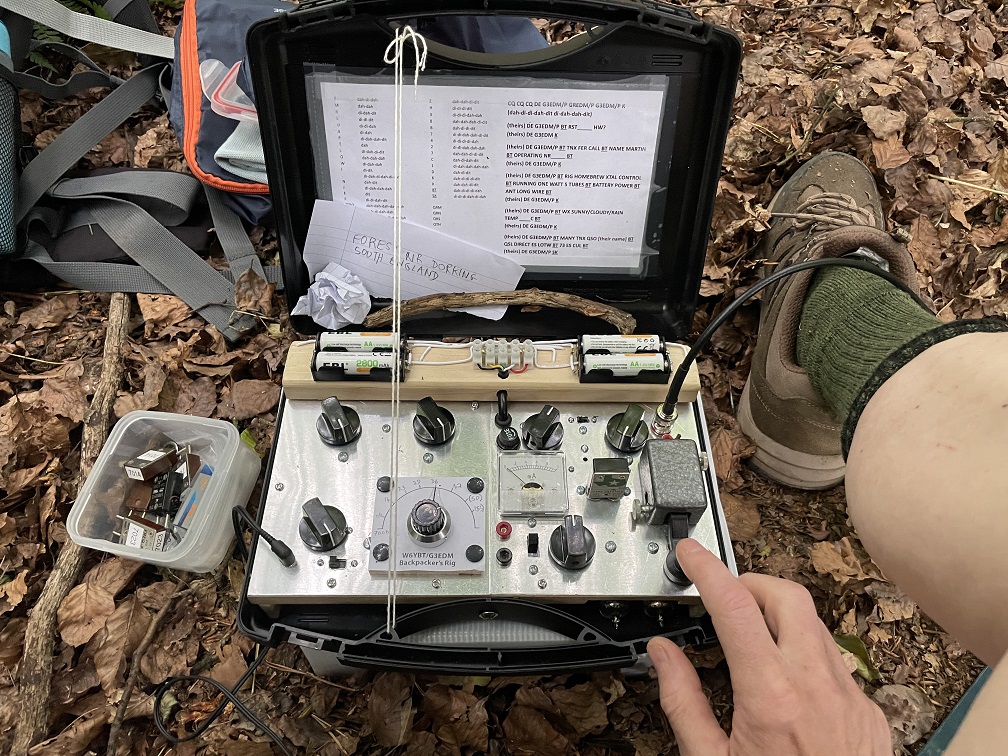
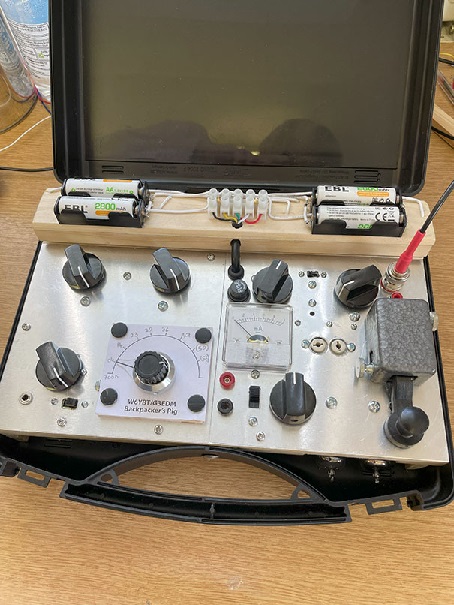
2025 G3EDM version. G3EDM photo.
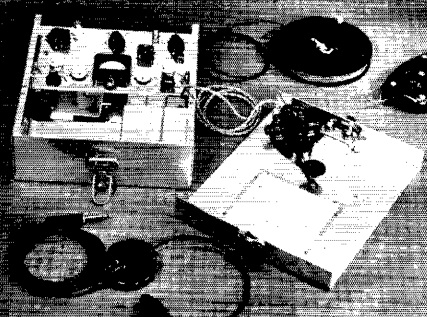
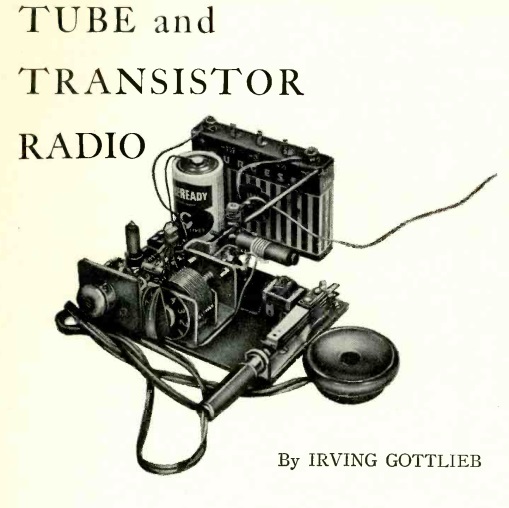
1950 W6YBT version.

Seventy-five years ago this month, the September 1950 issue of QST carried a construction article by Robert Vreeland, W6YBT, for the “Mountaineer”, a QRP transceiver designed by Vreeland for hiking treks in the California Sierras. He notes that while most hikers would argue against the added weight of even the smallest radio unit, hams were a different breed. Few hams would contemplate a vacation trek without bringing along some kind of radio gear, and the Mountaineer was his answer to the problem of how to explore nature while still staying on the air.

His design was for a single band, and he settled on 80 meters, although he recognized that 40 might be better for use during the day. When finished, his rig was useful for contacts of up to 20 miles during the day and 250 miles at night. The final design was a two-tube crystal controlled transmitter, with a 1U4 serving as oscillator and 3A4 amplifying with 2 watts input power.

The superheterodyne receiver consisted of three tubes, a 1R5 converter, 1U4 regenerative detector, and another 1U4 audio amplifier to drive the headphones. It shared the transmitter’s tank circuit as the input of the receiver and used a crystal-controlled local oscillator. Tuning was done in the detector, with each crystal covering about 120 kHz.

The rig’s enclosure provided space for extra tubes, fuses, and dial light. The author noted that since nights could be chilly, the set was usually operated from a sleeping bag, with an antenna of up to half wavelength.

The set measured 3x8x9 inches, and weighed in at 9 pounds, complete with batteries.

Unfortunately, we don’t have any photos of W6YBT operating his rig from a sleeping bag in the mountains, but we have even better! This year, 75 years after W6YBT first used the rig, Martin, G3EDM, was looking for a rig to take with him on a two-week 140 mile hike across England. And like W6YBT before him, going on vacation meant bringing along some kind of radio. According to an October 1993 article in 73 Magazine, W6YBT still just couldn’t leave ham radio at home, and eventually went solid state and got an MFJ-9020 QRP rig.

But G3EDM is our kind of person, and wanted to go “hollow state.” He eventually settled on the W6YBT design, with some modifications, and you can read his design notes at this thread on QRZ.com.

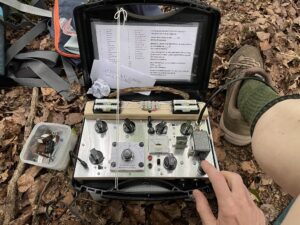
G3EDM at his operating position. G3EDM photo.

The color photo at the top of this page is not the 1950 version (for that we have only the grainy picture). It is actually the 2025 G3EDM version. There are some modifications. For example, the 2025 version is on 40 meters. Since most of the operating was to be done during the daylight hours, this was a better choice than 80. It also uses modern lithium batteries, which G3EDM was able to charge at night while lodging in hotels along his path.

He then outdid W6YBT (probably because we now have this internet thingie that makes it easy) by posting a detailed travelogue detailing his contacts at this thread.

He managed multiple contacts almost every day, usually set up outdoors, but sometimes from a hotel room. Most were to other stations in England, but he was spotted numerous times on the Reverse Beacon Network by stations in continental Europe. In fact, he copied a few stations in America who were trying to work him, and on a couple of occasions, his signal was heard across the Pond, although not strong enough for a complete QSO. The longest complete QSO was 430 miles to Scotland.

Martin’s complete travelogue thread is worth a read. Among other things, it does go to show that some of the old designs we feature here are not mere novelties–they really did work.  75 years ago, most people were unable to stay in touch with civilization while camped in the wilderness, but hams were able to.  It’s just as amazing that the same feat can be replicated today, not just with the ubiquitous cell phone, but with that same 75-year-old technology.
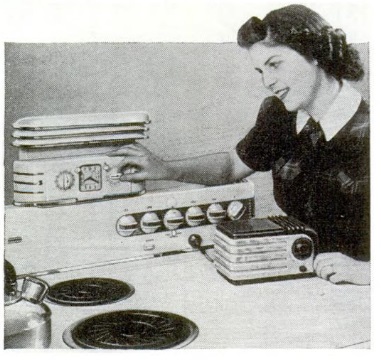


1988 Grocery Prices

For a snapshot of the cost of living in 1988, this ad for Amarraca Supermarket. While the prices might look low, there has been inflation in the intervening years. According to this online inflation calculator, one dollar in 1980 was the equivalent of $2.74 in 2025 dollars.  So for the modern equivalent, you need to multiply the prices here by 2.74..  This ad appeared in the September 22, 1988, issue of the Pittsburgh Post Gazette.

What would you make for dinner in 1988?


1966 One-FET Radio

It’s not a one tube radio, but this article from the September 1966 issue of Electronics Illustrated points out that the then-new Field Effect Transistor (FET) was, in many respects, the same as a vacuum tube. So this construction article by Charles Green, W3IKH, deserves a spot in our pantheon.

After explaining the workings of the new device, he provides construction details for the one-FET regenerative receiver. For strong local stations, an indoor 25-foot antenna would prove adequate. For more remote areas, he recommended a good outdoor antenna and ground.

The transistor is a 2N3820, which back in the day sold for $3.75. They’re still available, at a much lower price, on Amazon.


Some links on this site are affiliate links, meaning that this site earns a small commission if you make a purchase after using the link.