We admit that our ideas for science fair projects, even though they are extremely interesting, sometimes get a little bit complicated. And occasionally they could be a little bit dangerous if the student isn’t paying attention. Even though I know you’ll be careful, your parents and teachers might get nervous if you’re using toxic chemicals or playing around with lethal high voltages.
So today we present an idea that is extremely simple to carry out and should have no safety objections. Almost any student should be able to put the whole project together in a single evening. And the only materials you need are a piece of paper, some sand, and a couple of wheels connected together with an axle. If you rummage through your toybox, you probably have a toy car that you can borrow the wheels from. If you don’t, there’s probably a suitable donor as close as the nearest dollar store.
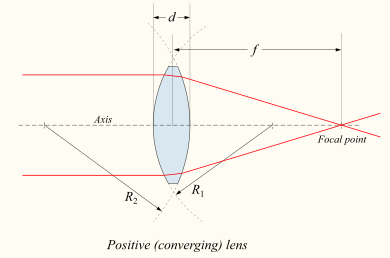
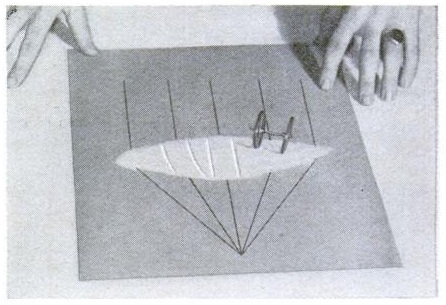
With these supplies, you can do a demonstration of how light is affected by a lens. You put a layer of sand on the paper in the same shape as the lens you want to examine. Then, you put the paper on a slight slope and roll the wheels straight down into the “lens” made of sand. Just like light waves hitting a real lens, the path of the wheels will bend. They will start out going straight down, but upon hitting the “lens,” they will turn toward the focal point. If set up correctly, all of the “light rays” will converge on the focal point, no matter where they originate.
Your science teacher, of course, demands more than simply coming up with some clever demonstration. You also are expected to come up with things like a hypothesis and conclusion. There are many possibilities here. For example, if the lens is more convex (in other words, if it’s “fatter”), then it will cause more of a bend, and the focal point will be closer.
Or, you can compare two lenses: A convex lens and a concave one. Your hypothesis could be that the convex lens will bend them in, and the concave one will bend them out. Your experiment will prove that this is correct.
It’s late, and you need to finish the science project by tomorrow morning. I understand. Almost all of the information you need can be found at Wikipedia, including the two diagrams below, which you will be able to duplicate with your “lens”. The red lines will duplicate the path of your wheel. The left side of the picture is the uphill side.


And if you really want to impress your teacher, you can include two “lenses” and make a telescope, again, simply by following the Wikipedia diagram:

The photo at the top of the page comes from Popular Science, February 1937.

