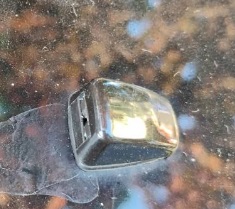
The new nozzle, as installed.
I recently had to replace the windshield washer nozzles on my 2014 Dodge Journey. My son helped me, but it was an extremely easy and inexpensive job.
Previously, the hose running to the nozzles broke at the point right where the hood hinges. I replaced that originally with a piece of tubing and two hose clamps. It leaked somewhat, but it worked well enough. But eventually, the connections to both nozzles broke, and it stopped working entirely. So, of course, I went to YouTube and found this video, which shows the entire repair process:
Interestingly, mine broke in exactly the same three places, and other people reported that theirs also broke in those three places. Armed with the knowledge of how simple the project was, I ordered the replacement parts on Amazon. I probably could have found the nozzles at an auto parts store, but for probably less money, the Amazon kit included all of the parts that I might potentially need to do the repair. As you can see from the
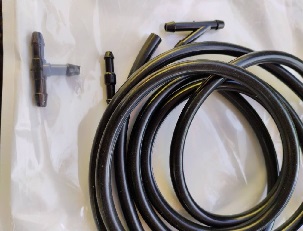
Leftover parts from kit.
unused parts at left, it included as much hose as might be needed to do a complete replacement, as well as enough fittings, just in case I needed to replace everything. According to the Amazon listing, the same parts are used on a number of Chrysler vehicles, including the following: 2008-2017 Grand Caravan, 2007-2012 Caliber, 2001-2010 Chrysler Pt Cruiser, 2005-2010 Chrysler 300, 2005-2010 Jeep Grand Cherokee, 2008-2015 Patriot, 2009-2010 Dodge Ram 1500 2500 3500 Pickup, 2006-2010 Dodge Charger, 2007-2016 Journey, 2011-2017 RAM 1500 2500 3500 4000, 2008-2011 Dodge Avenger, 2004-2009 Dodge Durango. The OEM part numbers are 5116079AA, 4805742AB, 5113049AA, 5303833AA, 55077460AA, 5160308AA.
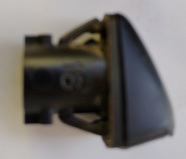
Old broken nozzle.
The repair job is very simple. If you examine the new nozzle, or the old nozzle shown at right, you can see that you just need to push a tab, and the whole nozzle then slides out from the top of the hood. You can’t see where the tab is, but it’s an easy matter to find it by pushing a screwdriver into the hole, as shown at left.
You then place the included gasket on the new nozzle, and snap it back in to the hole. You then simply slide the old hose onto the nozzle. If the old hose is no good, you can replace it with the new hose that comes with the kit.
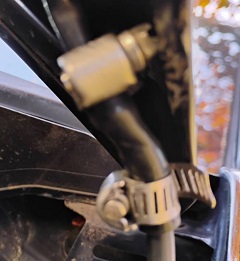 I could have lived with the leak near where the hood hinges, but we decided to fix that as well. Unlike the old tube I had found at the hardware store, the new one was just the right size and flexible enough to make a tight fit over the two pieces of original hose. The hose clamps probably weren’t necessary, but since I had them, I just put them back on.
The new nozzles aren’t quite as good as the original ones. I think they are designed for a sedan, and don’t spray quite high enough for the Journey. But they do the job, and they should be good for another 11 years of service.
Some links on this site are affiliate links, meaning that this site earns a small commission if you make a purchase after using the link.